How To Thread Suspender Slides


You may have landed here because you were reading my "Better, Faster, Easier Way To Make Suspenders" post... if not, definitely check it out.  In that tutorial I am using the vest buckles commonly found at craft stores.  This is just a quick visual of how you thread the suspender slides that look more professional.  The slides that I use have prongs which might be different than other suspenders slides you will find -- I buy them from Crafty Munchkins on Etsy

Operation Burlap Placemats: 4 Ways To Sew Mitered Corners


Placemats are something I don't give much thought to, probably because I never use them. I have some red chargers that I use at Christmastime and that's the extent of table accessories at my house. My mom, however, uses placemats at almost every meal. I love that, and the way she always puts a large plate under the soup bowl or salad plate, which I usually skip because it just seems like more dishes to wash. I should take the time to do that more. She has been using these rabbit placemats for years and years, they are really thick sort of like chipboard, and have a wipeable surface. So I made her these to change it up a bit.  These are burlap and cotton wih mitered corners, very natural and kind of French. The cotton border is teal with gold flecks. 

Find out who won the loopy blanket...


C.SanJuanIsland please email me with your shipping address: coconutlovexoxo@gmail.com

Finally Found A Way To Sew A Narrow Hem (That Doesn't Make Me Want To Rip My Hair Out)


At last!  I figured out the best way to do a narrow rolled hem. I made lots of doll clothes for my daughter for Christmas and I was going crazy with all those tiny hems!!!  I have a narrow hemmer foot but it's hard to get started and I can't get a consistently even hem. I tried pressing the seam allowance and then rolling the edge in to the crease but my fingers are too big and clumsy. So it finally occurred to me to just fold and stitch twice!

Framed & Padded Custom Printed Burlap Earring Boards - Perfect Last Minute Gift


If you don't have a lot of time or money but you want to give a personal gift, this is the perfect project.  You can whip this up in under an hour!  These padded frames are a parking spot for French wires - keep it by your bed or the bathroom sink, or keep your favorite pairs within reach.  They're not meant to organize all of your earrings, it's more like practical  artwork.  If you're giving earrings as a gift, make an itty bitty one for presentation.  I thought this was an original idea but then I saw that other people had the same idea... maybe it came to me subliminally via Pinterest.  I haven't seen any quite like mine, however.  The difference is that I print on the burlap to make it totally unique (a monogram would be nice), plus it's padded with fleece.  Keep reading and I'll show you how easy it is...  You need an old frame, some burlap and freezer paper. 

43 Project Ideas for Silhouette Cameo (Pin This!)


I debated calling this "43 reasons to get a Silhouette"...  If you're thinking about getting yourself a Silhouette (you should! and use my affiliate link please!) or you have one and you're not sure where to begin (it can be overwhelming), here are a variety of super creative ideas to get started.  Most have links to tutorials, but some are just eye candy.  I spent WEEKS putting this together so, for heaven's sake, the least you could do is pin it for later ;)  


Installing Snaps The Ol' Fashioned Way, With A Hammer


I'm not sure if "installing" is the right word, but here goes.  Different snaps may require different tools (for example, I haven't figured out how to put in a pearl snap without cracking it), and you can even buy snap tape... but I put in snaps the ol' fashioned way.  I have tried that plier/hole punch looking tool but I couldn't get the snap to align properly. I bought the package of snaps at Wal Mart that comes with the tool, and now I buy snaps in bulk but I still use the same tool.  I put snaps in my Irish flat caps, so that is what you will see in the examples.

How I Finally "Got" Compound Paths: Fleur de Lis Oval Frame with (you guessed it) Silhouette Cameo


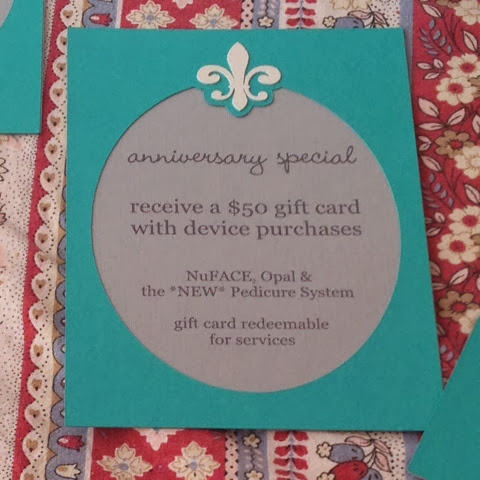
I made these fleur-de-lis signs for my mom's skincare business' 9th anniversary party, to match the invitations we made. I won't get too picture crazy but I want to give you the lowdown on how it went together.  I had a little breakthrough and came one step closer to understanding compound paths, which sure makes designing easier, so I hope this helps you "get it" too.

Ham and Gruyère Waffles


I had the rare opportunity to sleepover at my moms this weekend, and relished our morning coffee time in PJs. When I realized she had both ham and gruyère on hand, I knew we must make these waffles.  I don't make waffles often because, unlike pancakes which require only a bowl and a whisk, I have to go to the trouble of getting out the hand mixer to beat the egg whites which just seems like too much effort for a weekend morning.  These waffles, however, are worth the effort.  They are perfect with mimosas for brunch, and as soon as I perfect a complementary herbed butter I'll be a millionaire. Cheddar or Swiss would be just as good, but the gruyère adds a little je ne sais quoi.  (See there how I used a French expression and made it sound fancy without really describing anything?  That's what makes these waffles so good.)

Basic (But Not Too Basic) Design Functions With Silhouette Studio


If you're ready to move beyond downloading a shape, resizing it and cutting then you will appreciate this post.  I just took some screen shots showing some of the things you can do with the Silhouette Design Studio - Group, Ungroup, Weld, Subtract, Offset, Knife/Slice, Compound Paths, Align and Curved Text.  Just basic stuff, but some neat tricks that might take a while to figure out on your own (I learned a lot of this by pouring through countless tutorials online, hopefully this saves you the trouble).

Quick Nachos (With Real Cheese)


I was doing my usual Costco run the other day and they were sampling these Veggie chips that look like Tostito Scoops. "What makes them veggie?" I asked. I hadn't even planned on sampling them until she said "kale and broccoli" and I perked right up. Hmmm what's that now, kale you say?  Now, I realize these are essentially just corn tortilla chips with like a tenth of a gram of any remotely healthy vegetable... but that's a tenth of a gram that I won't have to fight about with my kids. Plus they were on sale for $3.69 a bag, a huge Costco sized bag, so that pretty much made up my mind. I used them to whip up these quick (super tasty) nachos.  I didn't revolutionize nachos or anything, mostly I needed to break up all the Silhouette Cameo posts I'm working on!

Yes, You CAN Use Cricut Mats With Silhouette Cameo!


One of the challenges with the Cameo is that not all craft stores sell Silhouette products, and sometimes you need a blade or mat or whatever NOW.  Not in however many business days plus shipping and handling... RIGHT NOW!  This is where I found myself while making 200+ invitations and needing a new mat.  I do believe my local Michaels sells Silhouette products, but I was at Hobby Lobby getting cardstock (I had already bought up everything in the color I needed at JoAnn and Michaels!) and Hobby Lobby only had Cricut supplies, so you see my dilemma.  I bought a 2-pack of 12x12 Cricut mats on sale for $9.99.  They also had one light grip or one super grip for $10-14, so the 2-pack was the obvious choice for me.

When I got home, I lined up the Cricut mat with my Silhouette mat to see the difference.

Fleur-de-Lis Print-and-Cut Invitations with Silhouette Cameo


This post contains affiliate links :)

I got real close with my Cameo this week. We're best buds now. We've had a love/hate relationship thus far, and you know what took us to the next level?  Patience. Patience and a new mat. I made hundreds (literally) of these fleur de lis invitations and learned so much about the Silhouette in the process. The majority of my issues were resolved when I got a new mat. I spent the better part of 2 days working on this project with my original cutting mat which had lost most of its stickiness. I was cutting through the mat, the paper was moving around and tearing, it was a nightmare. Finally I realized that I needed a new mat so I got a 2-pack of Cricut mats (yes, that's right) and suddenly the clouds lifted and there were blue skies and angels singing. For realsies.  Also at some point I realized that I hadn't been locking the blade in correctly - how is this possible?!  I have always thought the blade locking wasn't designed well.  So here is the lowdown...

Finally! Paper Cutting Success With Silhouette Cameo & How To Use Weld And Offset


Cutting paper has been one of the most frustrating tasks with my Silhouette Cameo!  (affiliate link) I suppose that's because there are so many kinds of paper so you have to keep tweaking the settings.  Today my patience was rewarded with my first major success.  I had to write it up quick before I forgot everything and I figured I would turn it into a little demo using some of the basic tools in the Silhouette Design Studio while I was at it.

Printable Heat Transfer With The Silhouette Cameo Using Registration Marks

This post contains affiliate links :)

Did you ever get a care package in college?  I remember the time my mom sent me the best. cookies. ever.  I'm putting together a care package for my cousin who is a freshman at UNLV. She's still living at home, and I thought she especially needs a care package so she doesn't feel like she's missing out on the dorm experience. She's very health conscious so I packed her favorite dried mango and toasted seaweed from Trader Joes, some makeup, and I made her this shirt.  Not the most academic of care packages.  The design is inspired by the tattoo she wants, an American Traditional heart and banner that reads "Rudig girl" - Rudig being our mothers' maiden name, and the Rudig sisters (our aunts) being three strong, capable chicks.

If you don't know much about heat transfers, you can do it a couple different ways.  You can buy heat transfer vinyl in different colors, and even layer them if you want... or you can use printable heat transfer paper that allows you to print the design with an ordinary inkjet printer.  The printable option is nice for designs with more than one color if you don't want to deal with separating your design by color and cutting/applying multiple layers.  Printable heat transfer is also a good option for designs with shading, like the heart and bird in my design.

My Bagel Breakthrough


I love bagels. Real bagels from a bagel shop, not bread-in-the-shape-of-a-bagel that you find at the grocery store. I have attempted homemade bagels but it's tricky to get that chewy crust just right, not to mention time consuming.  I don't plan my bagel cravings, so when the urge strikes (usually in the morning) I don't want to spend four hours kneading, proofing, boiling and baking to have bagels just in time for dinner. And to be more specific, the urge usually strikes on a weekend morning, so I am not inclined to get out of my PJs and go out into the world to make it happen. Unless we're out of coffee and I'm hitting the Starbucks drive-thru too.  No, I have found another way to get my bagel on.

Calling All Nerds: Captain America USO Girl Costume


An old highschool friend of mine requested that I make this USO Girl costume as a surprise for this his wife.  Awwwwwww!  Apparently they are comic book... enthusiasts (I didn't say nerds). I've never done anything like this, but I did a little research and took on the challenge. Here is the picture he sent me, which is displayed much more nicely than mine:

How To Make A Pre-Tied Bow Tie For Babies and Kids


I started making suspenders and bow ties to go with the flat caps I sell on Etsy, they are so perfect together! I took some pictures to show how I make bow ties, step by step.  I watched several tutorials and used the method from the video below, with my own measurements for kids and a couple extra tricks of my own.  It's a long video but his accent is just lovely :)

The Ridiculous Patent on Sensory Blankets & Toys (and How to Make Your Own!)


>>> Loopy Blanket Giveaway is over! <<< 

I will pick a FOLLOWER at random on 12/17/13.  The winner will be announced in a new blog post so make sure to "Activate" your subscription and check your Inbox!  To enter, use the box in the sidebar or follow this link: Subscribe to Coconut Love by Email  
.....

I admit, even though it's been a year this still gets me all riled up. Let me start at the beginning... Once upon a time I opened an Etsy shop and I listed some loopy blankets and toys that so many people sell. One day I received a message via Etsy from a third-party legal representative informing me that I was in violation of copyright infringement, or something to that effect.  Apparently one of the big toy manufacturers patented sewing ribbon loops or anything like it in the seam of a a blanket, like this:


And toys, like this:


Now I think this is the silliest thing I have ever heard.  It's almost like putting a patent on the way you put in a zipper or finish a seam.  It's a technique.  But far be it from me to fight The Man or find a loophole (hahaha no pun intended!) so I complied like a good shop owner and took the listings down.  That was before I found my niche in baby flat caps (plus there are SO many Etsians selling blankets that is is hard to compete).   I'm over it.

But I want to show you how easy they are to make - it's a great beginner project.  I'm actually going to cheat and give you links to a couple of my other posts.  Follow the directions to make a regular minky blanket.  It's doesn't have to be minky and cotton:  I recommend at least one side be minky, flannel, ultra cuddle or something soft, and the other side could be cotton or satin (or make both sides cuddly!).

After you have your fabric cut and before you sew the layers together, make ribbon loops (just fold the ribbon in half) and pin them around the edges of the blanket, but they should be facing in with the ends lined up with the edge of the blanket, like in my taggie toy post.  Here's a picture of how the ribbons go:


If you want more sensory-ness, slip a wooden ring or bead on the ribbon loop before you sew. Be careful of choking hazards and chemicals, duh.

If you like you can baste the ribbons in place on just one piece of the fabric before you sew the two layers together (like I have done in my picture), because when you sew the blanket right-sides-together and the ribbons are in-between it's easy for them to slip out of place.  Up to you.  I like to triple stitch the ribbons since they will be tugged on.

I have to say to be careful with loops.  Once, in her sleep, my daughter got her finger twisted in the loop of a bow around her teddy's neck ALL NIGHT which could have been pretty serious.  If you just want ribbons sticking out instead of loops, here's a cool tip:  To keep the ribbon from fraying, quickly run the flame of a lighter across the ends and it will melt and seal the edge.  This would be a cute way to make an animals tail or doll hair too.

You can sew other trims in a seam the same way (in-between the layers, raw edges aligned), like ruffles or the rope and fringe on my cowboy & cowgirl blankets:


That's how easy it is to make your own taggie blanket!

Since I can't legally sell the airplane one that I made, I'm giving it away!  I already have a minky blanket giveaway going on so follow Coconut Love on Blogger or Facebook for details on how to win this airplane loopy security blanket a little later on...  The contest is on...

This airplane blanket is a small, security blanket size taggie with ribbon loops on one edge.  It has minky on one side, and it's perfect for the carseat, peekaboo and traveling everywhere with your little guy.  

To enter, subscribe to receive Coconut Love posts by email (in the side bar)  or click here:


Don't worry, I only post about once a week so I won't clog up your email :)

I will pick a follower at random on 12/17/13 and announce the winner via new blog post, so make sure to "Activate" your subscription and check your Inbox to see if you won.  If you like you can always leave a comment to let me know that you're following.


Thanks for visiting!


Dear Diary: Standard Process 21-Day Cleanse


I just finished a cleanse and I'm here to share my experience with the world, or the two of you reading this. Haha. As you might know from other posts, my mom has a skincare studio in Half Moon Bay. I blog about my mom a lot, don't I? She is a strong believer in the link between food and skin, and every three months a group of her clients do this 21-day cleanse together under the guidance of her doctor.  We have a private Facebook group and a weekly potluck to try other people's food and it's really cool.  Whether or not you "believe" in cleansing for detox purposes, there are other outcomes that you will learn about if you keep reading.

Sauteed brussel sprouts with lentils

6 Potentially Life-Changing Makeup Tips


Betcha didn't know that I moonlight as a makeup artist?!  You wouldn't know it by looking at me most days, I give off more of a mom-of-3-kids vibe.  I wasn't even into makeup most of my life, but I kind of fell into it when my mom brought mineral makeup into her skincare studio.  When you have everything at your disposal to play with (and develop a minor addiction to makeup tutorials online) you learn fast! It does help to have an eye for color and understand how to enhance features of different shapes and sizes - and above all know how to communicate with your client!  I received some pro training and did some freelance work for a San Francisco-based cosmetics company, and now I'm the resident makeup artist at Abundance.  Here are some of the best tips and tricks I've picked up along the way...

Kandee Johnson's Concealer Trick


Easy Silhouette Cameo Project - Personalized Doggie Vinyl Window Sticker


I admit I totally copied this idea from places like this on Etsy, but it was a really fun, easy project to break in my Cameo.  Sorry I didn't capture the whole process with photos - if you know a little about the Cameo it is easy to figure out.  This is the perfect beginner project -- if you don't have your Silhouette yet, I'd appreciate you using my affiliate link!

New Toy! Fabric Tube Turner


Remember my post about using two pencils to turn fabric tubes? And how I mentioned that I wanted a tool I saw on Sew It All (PBS) that looked like curved scissors/tongs?  Well my dearest mommy got them for me for my birthday - yippee!  And here's how it works: