


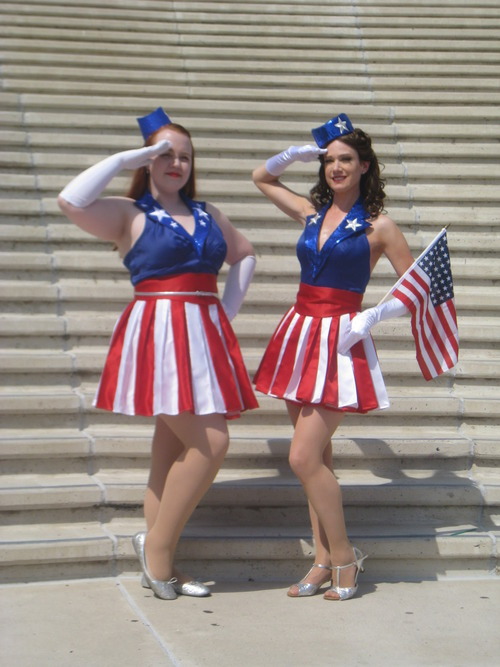
An old highschool friend of mine requested that I make this USO Girl costume as a surprise for this his wife. Awwwwwww! Apparently they are comic book... enthusiasts (I didn't say nerds). I've never done anything like this, but I did a little research and took on the challenge. Here is the picture he sent me, which is displayed much more nicely than mine:
 |
| Available from OliviasStudio on Etsy |
And here is another example from a blog called knock knock knock penny where she shows how she put hers together (which was very helpful in constructing my version):
In case you are wondering, no, there's no commercial pattern for this costume. Trust me, I checked. After LOTS of brainstorming and planning, I started to think I was in way over my head... because I was trying to draft my own halter pattern. What was I thinking? When I finally gave in to using a pattern it was smooth sailing. I used a cotton bottom-weight fabric instead of satin because it looks similar to the picture that was provided, and even though its a bit stiff, it adds a lot of shape.
I was leary of making a closed dress (one piece with a zipper closure) because I didn't have her exact measurements, and because she was long-distance I couldn't fit it to her as I made it. Note to self: invest in a dress form - pronto. Honestly my only experience sewing adult size clothing with a pattern was horrible - I made myself a shirt that was about 20 sizes too big, which later became a skirt for my daughter. So to ensure it fit her well, I made the top and bottom separate pieces, an adjustable top and elastic waist skirt. The belt and petticoat are also separate pieces.

I used Butterick 5209 to make the halter top. Actually the whole dress would have been perfect except that you can't make a circle skirt with verticals stripes, more on that soon. The halter pattern is very easy and came together in just a few hours. It was easy to add the sparkly lapels. I love this tip that came from my beloved Aunt Paula: I used a glue stick to fuse the sparkley netting to the main fabric (it beats a $15 bottle of spray adhesive for sure). I ironed the cotton piece, then applied the glue stick around the edges of the warm fabric, and finally smoothed the sparkle fabric over the cotton pressing into the glue. I also used medium weight sew-in interfacing to the lapel. Iit was easy to sandwich the lapel between the bodice and lining when sewing them together. I finished the halter with hook and eye closures.

Here's how I tackled the skirt. In order to get maximum poof, it has to be a circle skirt. I knew that there's a specific way to cut a full/half/quarter circle skirt, none of which worked or me because of the striping. What you have to do is cut each stripe in a trapezoid shape, wider on the bottom.

I knew her approximate waist measurement so I had to figure out how wide the bottom of the skirt needed to be. In the Butterick pattern it was almost quadruple (waist to hem 1:4), however - stay with me now - since I was making an elastic waistband, the skirt waist needed to be wider than the actual waist measurement so it could gather down to size thus creating some fullness, so... I decided that making the bottom width triple the waist (waist to hem 1:3) was enough fluff. If you are a math-a-phobe you might want to skip the rest of this paragraph. Lets use real number examples. Say her waist is 26", the skirt waistband needs to be 1.5x which is 39" (actually this was a little too big, I had to make some pleats so the elastic would stretch to fit better. I would probably do 1.25x next time). Then figure out how many panels you will need to make: I knew I wanted them around 3" wide at the top, so that is 13 panels (39/3). However, we need an even number of panels so that we don't end up with two of the same colors together, so I'm going with 14 panels and figuring out the widths from there. A 39" waist divided by 14 panels is 2.78". Lets round to 2.75". So the top of each stripe is 2.75" wide and the bottom is 3 times that, which is 8.25". Then add 3/8" seam allowance to each side (so +3/4" to both numbers). Whew. Time for a coffee break.


After you piece the skirt together you just attach the waistband and
sew the hem. I like to hem with bias tape. This was my first time using
2" elastic for the waistband and I love it. So much easier than
threading elastic through a casing, plus it is comfortable and will never
get twisted. I think I'm going to start using that for my daughter's
clothing.
The outfit is almost complete! This USO girl needs a belt. I used medium weight fusible interfacing in the front, and I used a glue stick trick to fuse the sparkly netting like with the lapels. My friend liked the bow in front like in the picture he sent me, so I made a pre-tied bow with a little flap that attaches to the inside of the belt so with Velcro so that it can be worn with or without then bow. Smart huh?
The outfit is almost complete! This USO girl needs a belt. I used medium weight fusible interfacing in the front, and I used a glue stick trick to fuse the sparkly netting like with the lapels. My friend liked the bow in front like in the picture he sent me, so I made a pre-tied bow with a little flap that attaches to the inside of the belt so with Velcro so that it can be worn with or without then bow. Smart huh?


 |
| The inside of the belt |
For the pillbox style hat: the top is just a circle with heavy craft fusible interfacing, and then a long rectangle backed with medium sew-in interfacing for the band. I sewed some elastic thread to the insides for a chin strap. Later I ironed on some the stars which totally make the hat.

I found the perfect little embroidered star appliqués at Joann and finally the costume was coming together!
 |
| My messy sewing room |
Lastly, I made a petticoat to help the skirt stand out. I used the method from Rock N Roll Bride, attaching multiple layers of gathered tulle to satin with an elastic waistband. I made it longer than the skirt so it would peek out. Also I was concerned that the skirt might be too short so the longer underskirt was for modesty.

You'll notice I started out making the petti-skirt with red, white and blue sparkly tulle but it wasn't strong enough to hold up all that heavy cotton. So I went and found actual "petticoat net" and it worked like a charm.

This was such a fun project and I learned a lot in the process. It was so gratifying to see it all come together in the end, and to be a part of a sweet surprise for this couple. Maybe she'll send me a picture so I can see how it looks on ;) ;) ;) I was rushing to get it off in the mail before I had a chance to get some better pictures, as is usually the case.

Could you PLEASE send me your pattern design?
ReplyDeleteI really don't have a pattern! I would buy a halter pattern and add lapels (just trace them from a blazer) and piece the skirt together and attach it. I tried to put links to all my resources...
Deletethanks
ReplyDeleteI really don't have any money to buy any patterns, is there any way you can scan your pattern?
ReplyDeleteI really don't have a pattern to copy. You can get patterns on sale for $1 at Joann's sometimes, for the halter top. The rest is just a mishmash!!
DeleteAbout how much did it cost to make?
ReplyDeleteI think you could do it for under $50 easily. I think I got 1 yard each of the red, white and blue, the stars are iron-on, the petticoat netting... Save your JoAnn coupons!
Delete