


First find an old frame to upcycle, you might have one handy or try Good Will. I used both metal and wood, and I sanded the wood frames to give it a distressed, shabby chic look.
Before: tired old chipped wooden frame :(

After: adorably vintage :)

Then find some clip art that you want to print. I also used shapes from the Silhouette online store. I actually did everything in Silhouette but didn't cut anything, just the "Send to printer" button.
Cut a piece of freezer paper to a width that will fit through your printer (mine is a standard letter size 8.5"). Iron the shiny side of the freezer paper to the burlap. This helps the printer feed the burlap through the rollers. If you have trouble with the burlap going through your printer, try leaving an inch of freezer paper at the top. ***f you've never used or crafted with freezer paper before, it's worth the $5 to have in your stash (check out these shirts my BFF made with freezer paper stencils--fun!)***

Put the burlap in the paper tray so that it will print on the burlap side (for my printer the burlap goes face down). Print your clipart sized for your frame. Then peel the freezer paper away.

Using the glass from the frame as a guide, cut the burlap to size. A rotary cutter works great. Cut a piece of fleece or batting the same size.
Use a glue gun around the inside edges of the frame and glue the burlap in place. Put the fleece over it and then cut slightly smaller pieces of fleece to keep layering behind the burlap. The number of layers will depend on the frame but I always had around 3-4. When you put the back on the frame it will give a firm, padded look. Sorry I didn't get pictures of this step.
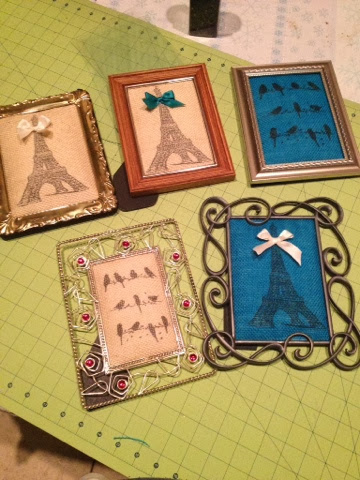
I embellished with rhinestones and bows. I was going for a French theme, can you tell?

I loved the chandeliers...

Have I mentioned that I'm in love with making these little bows?

I'm working on a deluxe version that will handle more than just French wires, so stay tuned for that!
No comments:
Post a Comment
Comments are very much appreciated!