


I made this little set of cosmetic/toiletry bags for a friend's daughter's birthday, with the thought that she could take them to college in the fall. Or toss it in her soccer bag. Or whatever the heck she wants. I used a cotton laminate, so it would make a great wet bag too. I love the red and turquoise zippers with the black and white dots. And sewing zippers is just about the most gratifying thing I can think of at the moment. Speaking of zippers, I'm going to show two slightly different ways to put them in, and P.S. I use a larger-than-necessary zipper and cut off the excess. If you want to make your bag a specific size, I have included a little worksheet on how to figure the dimensions of your fabric ALLLLLL the way down at the bottom of the post.

The smaller, boxier bag measures 4x9x4 inches which is quite large for a cosmetics bag - it's more like a men's shaving bag. But it's a great size for a weekend getaway because you could probably fit your face wash, moisturizer and hairbrush in there with your makeup. Instead of lining the bag, I sewed the lining pieces to the outside pieces (as you will see in the first steps) so there ARE exposed seams in this bag. Enough jibber jabber, let's get sewing.
For the smaller bag:
You need 4 pieces that are 9x14 inches each.

Put two wrong sides together and zig zag or serge around all 4 corners.

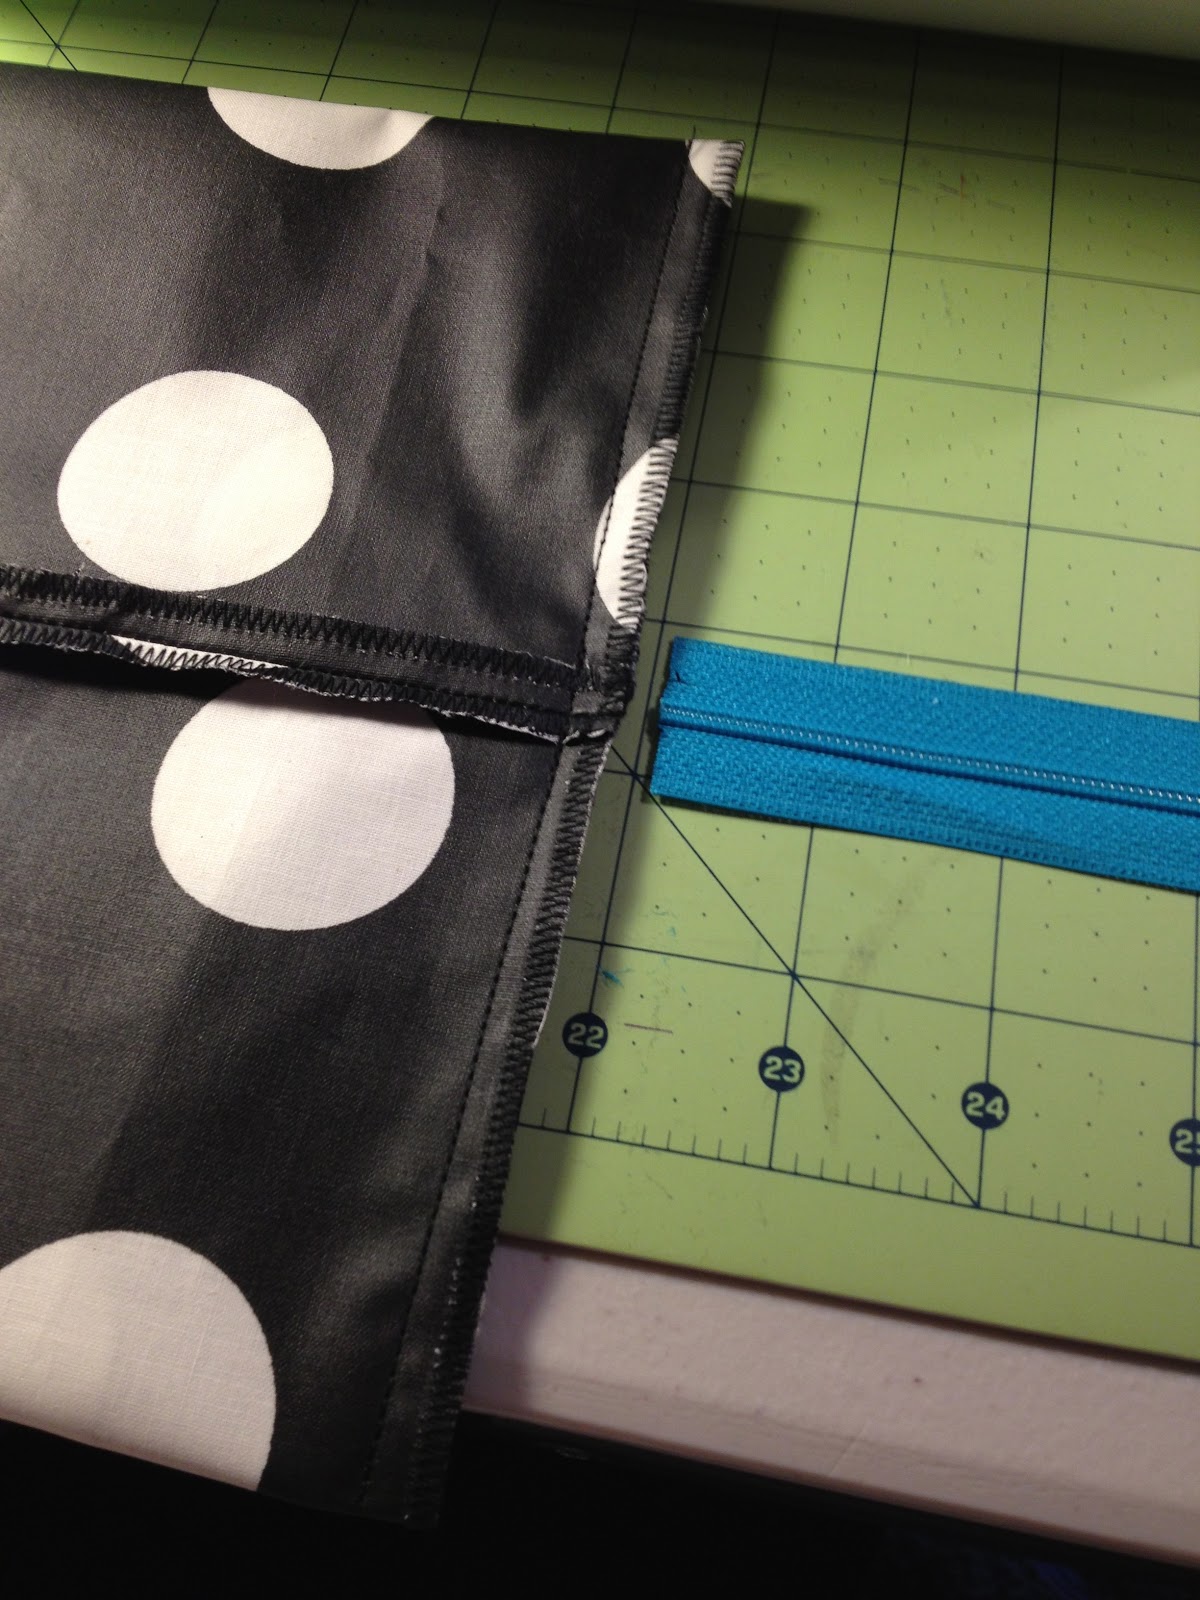
Now you have two reversible pieces.

Place your zipper along the top edge (a long side) of one of the pieces, RIGHT SIDES TOGETHER, so fabric face-up and zipper face-down... and pin in place. Just let the zipper hang off both sides.

And use your zipper foot to stitch them together.

Now we want to topstitch so that it's nice a flat and smooth and the zipper will open and close smoothly. Fold the zipper under so it's flat and both the fabric and the zipper are face-up.

And top-stitch, still using the zipper foot.

Nice and flat...

Now repeat the steps to attach the other piece of fabric to the other side of the zipper. Just remember RIGHT SIDES TOGETHER. Sorry, my pieces are reversible so you can't really tell the difference. It will feel like the piece that's already attached is going to get sewn in there but they won't because your zipper foot won't let you (you'll see what I mean when you get there). When you're done you should have this:

Now fold the pieces right sides together, and sew the bottom seam (I use a 1/2" seam allowance).
.

* If you want your seam allowance to lay flat in the bottom of the bag, at this point you can open the zipper and unfold the pieces and "top-stitch" the two seams down. Sorry no pix, I didn't do this.
Now rearrange the tube so the bottom seam is directly on top of the zipper like this:

Try to line up the zipper and seam:

Sew down one of the sides, right over the zipper, and cut off the excess zipper sticking out of the seam allowance (make sure you don't cut off the zip pull, it should be on the other end or half-way open).
*In hindsight, I should have attached a tab on one side to make closing the bag easier. You would just take a strip of fabric (raw edge folded in however you like) and fold it in half and place the loop between the layers with all raw edges even and stitch across all 3 pieces when you sew the side seam. Kind of like making a taggie toy. You want the pull-tab to be on the end opposite the zipper-pull when closed.
Before you sew the next side, make sure the zipper is open so that you will be able to turn your project inside out later!

Sew the second side to close the tube. Cut excess zipper. If you stopped now you would have a very large flat pencil case looking thing like this one:

Now to make those boxy corners! You may remember how to make those from my lunch tote tutorial. This time the triangle flappies are going to be going a different direction. If you've never seen this before it can be tricky. Just visualize that you want a vertical seam in each corner to make this cube-like. Take a look at the photo below to get oriented with your fabric (the zipper is on the left, the bottom seam is on the right, and the corner is flattened with the side seam centered with a nice point). Play with it for a few minutes and you'll get it! We are going to mark where the triangle is 4" long (because the bag is going to be 4" tall) which is 2" below the point. See my chalk line? Sew along the line - make sure to backstitch at both ends.

Repeat on the other 3 corners and you will have something like this:

At this point I recommend turning the bag inside-out to make sure your seams are how you want them (straight, even) and THEN snip the flaps off.

And you have a boxy zipper bag!


Later I stamped her name on an aluminum blank and attached it with a large jump ring. Want to see more metal stamping ideas?

For the larger bag...
I wanted something taller that could fit things like a hair dryer, maybe a towel or shower shoes, or big products like hairspray or lotion. I actually wanted it to be taller and the bottom to be deeper than it is, but I had a limited amount of the material left - don'cha hate it when that happens?!

The construction is the same except the bottom has 2 horizontal boxed corners just like in the lunch tote tutorial, and the zipper hangs off the end of the bag, almost like a handle. So here is a quick step-by-step and pictures of the zipper insertion:
- Cut 4 pieces 16x12 inches
- Sew wrong sides together to get 2 reversible pieces
- Pin zipper to top edge (short side) of one piece. On one side, align the end of the zipper with the fabric edge (instead of letting the excess hang off the end like before), then fold the end flap back and pin down like in the next photo. Use zipper foot to sew the folded zipper flap to the fabric, and then continue down 'til you are 1 inch from the edge of the end and STOP! Do not sew the zipper all the way to the end. Backstitch and remove the piece. (sorry I didn't get a picture of this)

- Fold zipper under so everything is flat and right side up, and top-stitch. The tricky part is, you want to stitch the beginning and end parts that aren't attached to the zipper, which seems weird because you have your zipper foot on but you're not sewing over the zipper. When you finish you will have this:

And this:

If the long, hanging part of the zipper got sewn folded on itself, just unpick the stitches so the zipper is flat.
See how I left the end long so it could act as a handle?

I attached some material to the end of the zipper so it didn't look so "unfinished" and attached a stamped zipper pull:

- To finish the bag, put right sides together, with the zipper open and the long end of the zipper tucked toward the inside of the bag, sew both sides and the bottom with a 1/2" seam allowance.
- Make the box corners like in the lunch tote tutorial (make the corner into a point and flatten so that the side seam and bottom seam are aligned). Find your sewing line which should be approximately 2" long (or longer if you don't mind the bag being shorter) - stitch and trim.
- You're done! Turn the bag right-side-out. The long end of the zipper should hang off the side.

Here's how to figure out your own measurements if you want to make it a certain size:
- Start by figuring out the dimensions you want the bag to be when it's finished. We'll use my 4x9x4" as an example. We are only concerned with the length and width of the front and back pieces which will be the same.
- To build the depth into into the LxW number, it is important to understand that since there is a front and back piece, each piece will wrap around and meet halfway so we will be dividing the depth in half. You'll see...
- Let's start with length. It will be 4" high, and to make it 4" deep we'll wrap around 2 inches on the top and bottom - the other 2" wrap around will come from the other side. So 4+2+2 = 8.
- Now for the width. The bag will be 9", and since it will be 4" deep, add 2 inches to each side for the wrap around (again, the rest of the depth comes from the other half of the bag.) Now the width is 9+2+2 = 13.
- Add an inch for seam allowances (1/2 on each side) so 8+1 and 13+1 = 9x14.
Do these pictures help?


I hope that wasn't too confusing! It's really not that hard.
Here are the tutorials that I used to double check myself before I did something out of order or got myself in a pickle:
At Noodlehead she has great pictures of sewing the zipper that extends off one side.
At three bears she shows how to make the boxy pouch - I like how hers looks more rounded on top, as opposed to my very square Kleenex box looking thing.
Now go make one for yourself!
What kind of fabric is that? and where can I get them?
ReplyDeleteHi! It's a cotton laminate from Ikea. Tnx :)
DeleteEverything looks so neat! The power of a serger :)
ReplyDelete