


I'm completely and uncharacteristically obsessed with fixing up my house right now. Actually, I am completely obsessed with moving a little further out of town and getting a few acres where my daughter and I could have a hobby farm ... BUT that's not happening anytime soon. It must be spring fever. I detest gardening, but each spring when there's a little green on the hills and some blossoms on the tree, I find myself pruning or edging the lawn or shaping the tree while the kids play outside. But this year I've got the itch to remodel. I've got it bad. We can't afford to buy a charming little ranchette nestled in the foothills, so I decided to turn the house we have into something fantastic. Besides, even if we could afford to move right now, I realized how much we would have to do just to sell this house and thought, we might as well enjoy the upgrades, too!
But we aren't DIYers. I am the handy one in the family - I own a drill but no power tools. The most I've done is paint our bedrooms. I've replaced the kitchen faucet, and even that was pretty ambitious. The only project that truly NEEDS to be done, and soon, is the floors. The original carpets are trashed despite cleaning them a couple times a year. The rest is just to freshen things up a bit. For my sanity, really. After 11 years and 3 kids, mama needs some change!
Yes, I've got the fever. I started pinning ideas and researching how to refinish cabinets, what kind of countertops we should choose, and the pros and cons of faux hardwood flooring. The goal, or the dream, is: dark, wide plank wood floors, white cabinets, backsplash, stone countertops with an extended bar and seating area, coordinating white/stone fireplace/mantel in the adjacent room, and stainless steel appliances. Sounds expensive huh? Since this isn't our "dream home" or "forever home" I'm willing to use some fakes and illusions here and there - in my research I found some cool inexpensive and easy DIY alternatives (just a teaser so you keep reading: stone veneer, chalk paint and stainless steel paint, peel and stick backsplash, and vinyl flooring).
FREE FIXES
I could make huge changes just by moving around the furniture. I've never liked our arrangement - the front door opens to recliners and a big screen TV, the area that is designated for a dining and sitting area. It feels like a bachelor pad to me.
Another easy fix: get organized! I have to admit, organization is not my forté. Toys and junk pile up because there's no place for it. It doesn't have a home. Mail and coupons and receipts on the kitchen counter. Half finished projects are moved around from the sewing table to the computer desk to the kids' desk to the ironing board. It doesn't help that there are toys everywhere I look. It's overwhelming.
CHEAP, EASY, FAST FIXES
The Furniture
One thing I plan to do is refinish our dining table with resin (the same resin I used for the washer necklaces in this post). The table is super old and totally beat up, so if it doesn't turn out great it's no big loss. And if it works out, I've just saved us a nice chunk of change by not buying a new set. Since I want to move the table out of the eat-in kitchen and into the real dining room, I can leave the table extension in permanently (because with resin it will seal over the seams). I'm not sure if I will use fabric or pennies, but it's so easy to tape off the edges and pour the resin for a new, glassy finish. Here are some cool examples:

 |
| tutorial at Little Green Notebook |
 |
| tutorial at Imperfectly Polished |
The Decor
Another easy makeover... window treatments! I made these silly wannabe valance window coverings a year ago but now I would really like to have some light, drapey sheers that hang all the way from the ceiling. We have small windows above the main windows, and we really need to be able to block the sun as it gets very hot, creates glare, and really gets in your eyes at times. I really liked these that I saw on Pinterest, the horizontal striping is kind of modern and clean:
 |
| tutorial at The Yellow Cape Cod |
TAKES A LITTLE TIME AND ELBOW GREASE BUT SAVES A LOT OF MONEY
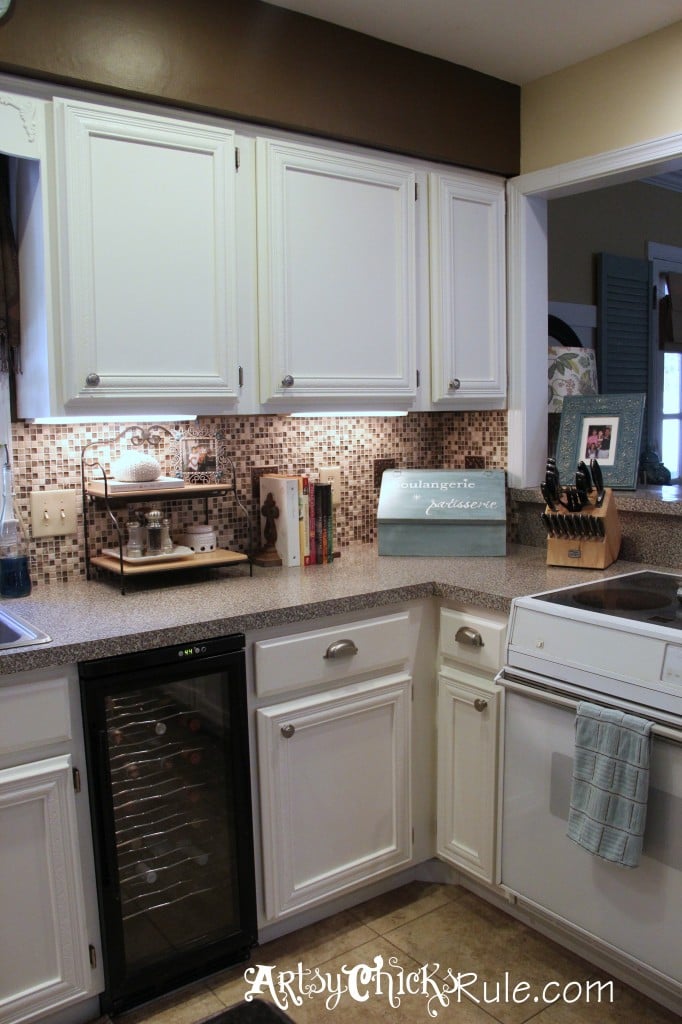
Painting the cabinets will be time consuming but relatively inexpensive considering the impact it will have. I think I am going to follow this tutorial and paint the kitchen cabinets white with chalk paint, which doesn't require sanding or priming. Let me repeat: NO SANDING OR PRIMING! Cant I get a hallelujah? This means you take of the doors, paint and dry, paint and dry, seal and put them back up. Instead of sand, prime, prime again, paint and dry, paint again, seal and put up. Here's a picture from the tutorial I just linked to:
I want to do a dark gel stain in the crevices, but I don't want it to look too distressed or too whitewashed. I know it will be time consuming but it will look so beautiful. Funny side note: my husband was worried that I would "ruin" our cabinets until I showed him their current state. Some of the boards are worn down to the bare wood and starting to splinter (I know I will need to sand these, since I mentioned not needing to sand with chalk paint) and now he's excited about the transformation.
If my husband didn't go for white, I liked this gel stain technique to give our "builder grade" cabinets some personality:
 |
| tutorial at HGTV |
The Hardware
Then of course with "new" cabinets we'll want some flashy new hardware to go on them. Here is a cool post by Lil Boo Blue about hardware (the links aren't there like the photo says but you can click to her post:
 |
| from Lil Boo Blue |
As I imagined our kitchen with white cabinets, I realized that our white appliances would probably make the cabinets look too yellow. I figured when the time came to replace them we would just get stainless steel (our fridge is on its last legs anyway). Then I thought of the white hood over the stove and that I would hate to replace a perfectly good piece just to go stainless, and that it might pose a problem for the cabinets above it. So I got smart and looked up "stainless steel paint" and sure enough, it's a thing. I saw some great before and after photos of painted appliances that look like the real deal. And, it IS actual liquid steel in the paint, not just a metallic color paint. That's good enough for me as far as my hood is concerned. It's nice to know that it's an option for the fridge and other appliances too, not to mention some really cool kitchen accessories and home decor!
 |
| from Thomas' Liquid Stainless Steel |
My husband and I really like the stacked stone look, and I was researching DIY backsplashes and I came across this stuff called Air Stone that's available at Lowe's. At first I didn't even consider trying to do the backsplash myself. The thought of laying tile and all those spacers and messy grout... I was willing to pay a professional to do it. Well, Air Stone is a faux stone veneer that is lightweight and you basically just "glue" it to the surface you're covering. You can cut it to size with a hand saw, no power tools required. It looks totally do-able. And I went and looked at it in person and it feels like real stone too.
 |
| from Stilettos and Diapers |
 |
| from In My Own Style |
Well, later I found another great DIY backsplash... Peel and stick grout-free tiles. So we will have plenty of options in that department. I worry about the tiles falling off so I would have to do a lot of research beforehand.
 |
| from Design Sponge via Centsational Girl |
THE EXPENSIVE STUFF
The Counters
The two major expenses are the counters and the floor. My husband is set on granite countertops but if it saves us money, I'd like him to see quartz and soapstone too (I'm really favoring soapstone right now). Bet he won't know the difference. I also considered concrete, stainless steel and butchers block but I think I would prefer stone. There are plenty of ways to update countertops without installing new ones, but in our case I think we would cough up the money to have new ones professionally installed, mostly because we want to expand the bar as well. Since we're putting in new counters anyway (someday) we plan to make it bigger to replace our eat-in kitchen table. Our kitchen overlooks the family room, and the counter is raised like a bar but it's not deep enough (not enough overhang) to actually use as a bar. We've always wanted to build it out and get some barstools (the carpet makes barstools a little awkward too). I would really prefer that the whole counter/bar to be one level so that it is open to the adjacent family room and makes the whole room feel more spacious, but if it requires too much demo or it's too complicated to move the electrical then I would keep the existing two level format. Here are some of the kitchens that are inspiring my choices:
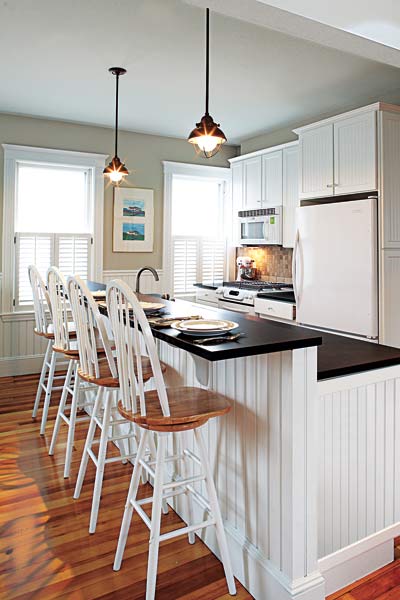 |
| from This Old House |
 |
| via Pinterest source unknown |
I really like the wide planks in the dark cool shades of brown. I think dark wood floors with white cabinets with stainless steel accents will be the perfect mix of country and contemporary. Because the budget determines everything, I was originally looking at laminate. The fake wood flooring options are kind of confusing. I think this is how it works: laminate is actually pressed wood pulp with a "picture" of wood grain and a protective coating on the surface, but there is another option... there are "luxury vinyl planks" that are not wood-based at all. Don't picture grandma's linoleum when you think of vinyl flooring, technology has come a long way and the wood plank vinyl looks really nice. Vinyl plank can be glued down or locked together, the latter is called a floating floor. I think laminate is technically more desirable, but the reason vinyl is more suitable for us is that it's WATERPROOF. Doggie accidents and toddler spills - my husband's biggest fear - won't ruin these "hardwood" floors. The other benefit is that it solves my other dilemma: the bathroom (you can't put laminate in the bathroom). Also I've heard laminate only lasts 5 years or so, and vinyl is built to last. Since my husband didn't want to put in ANY new floors until the kids are grown and the dog is ... gone ... this was a great option for us. I'm not sure which brand we will get but the Home Depot Traffic Master by Allure is very popular. It is a floating floor but the planks are also glued to each other but not the floor, so kind of unique.
 |
| from Home Depot |
Vesdura is another popular brand available through Amazon (affiliate link):
Another dream project that I can put off for a few years is doing a garage conversion. We only keep one car in the three-car garage anyway. The reason for the conversion is that the 3 kids share 2 bedrooms. Sharing is no biggie but we've got a 9 year old girl sharing with a 2 year old boy. We figured by the time the oldest (14) goes to college, the youngest will take over his room and our daughter will just be at the age where she will want some space and privacy. But in this day and age many college kids are living at home to save money and we don't want to kick him out of the house... hence the garage renovation! Plus, we can use it as a guest room or rec room in the future. I'm a little wary of jeopardizing the resale value by taking away the garage, so I might have to turn the garage into a workspace and give up my beloved office. I'm thinking about just doing a major cleaning and sanitizing in the garage, weather-proofing and RODENT-proofing, and making it a playroom and office area without a real conversion.
The Attic
I'm too scared of all the nasty things that could be hiding in our attic to go look, but if we had enough height to make it usable space that would be totally awesome. It could be a playroom or extra bedroom... oh, the possibilities! I wonder how it would compare to a second-story addition, financially speaking.
Updating is so fun. You have some great ideas. Please make sure to post before and fates pics... And I can't wait to see the changes!!!
ReplyDeleteI'm exhausted just thinking about doing the floors but I'm super excited and don't want to lose momentum! I will mos def post about it :)
Delete