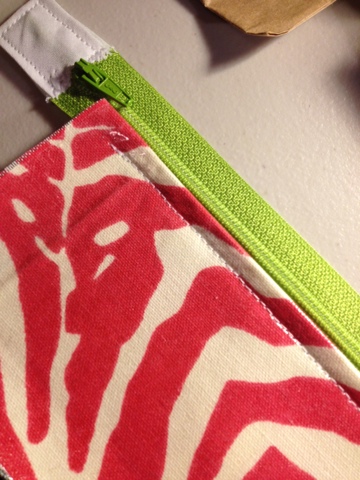
Here is what you will need:
Outside fabric*- 1/4 yard home dec outdoor cotton fabric or 1/2 yard quilting cotton, cut as follows:
3 pieces 9x6.5"
2 pieces 20x3.75"
Inside fabric*- 1/4 yard oilcloth, cotton laminate, home dec weight or 1/2 yard quilting cotton with Vinyl Fuse*, cut as follows:
3 pieces 9x6.5"
2 pieces 20x3.75"
1 package piping
20" zipper or longer, mine is 22"
12-15" canvas webbing for handle -- found with the by-the-yard trim
Apply Vinyl Fuse as needed (all inside pieces if not using waterproof fabric). You don't have to make the outside vinyl but my daughter preferred it shiny so I applied Vinyl Fuse to all pieces. *In hindsight I wish I would have used quilting weight cotton OR not laminated the outside fabric to reduce bulk.
Start by attaching your zipper to the long skinny pieces. It is a nice touch to sew pull tabs on each end of the zipper to make it easier to open and close. You can use fabric or bias tape. I left my zipper long with the intention of letting the ends hang off but it would look neater if you cut it to 20" and still made covered zipper ends.
Starting with one of the outside fabric strips, place the zipper centered along the long edge --right sides together-- and sew (with a zipper foot if you have it). Flip it over and place the zipper on one of the inside fabric strips --wrong side of the zipper to the right side of the fabric-- and stitch. You should have an inside and outside piece attached to one side of the zipper, like this:
Finger press the pieces to the same side and top stitch, like this:
Repeat with the other long skinny pieces on the other side of the zipper. Baste the 3 remaining edges of the inside/outside pieces together. Set aside.
Now we are going to make the handle... Take one of the 3 outside fabric pieces and your canvas webbing. Fold the ends under an inch and stitch around in a square with an X. I placed the handle 1/3 (or 3") from each end.
At this point I attached my machine's walking foot because, since I laminated the inside AND outside fabric, it was very "sticky". If you're only using vinyl on the inside this may not be a problem.
Now take all 6 of your 9x6.5" rectangles and pair the outside pieces with the inside pieces --WRONG sides together-- and baste around the edges.
For the bottom of my lunch box, I cut out the side of a plastic milk carton for sturdiness. I basted 3 sides, slipped the milk carton base inside, and basted it closed. Sorry I forgot to get a photo.
Next you're going to attach the back piece to the zipper piece. Take the remaining rectangular piece that does NOT have the handle and does NOT have a base in it... Place the short end along the short end of the zipper piece --right sides together. If your zipper is left intentionally long, the ends will stick out. Stitch along the short edge in two sections, do not sew over the zipper (see photo). If you do NOT want your ends long, go ahead and sew over the zipper and cut off any excess if its not already cut to size.
Repeat on the other end and you will have a tube of sorts. Pull the zipper ends through the gap so they are on what will be the outer part of the finished bag (the bag is inside out so it will seem backward).
Before we attach the top and bottom of the bag, we need to baste the piping to them. It helps to clip a notch in the corners.
Attach the first piped top/bottom piece to the tube --right sides together. If you laminated all the pieces as I did, the bulk can make this challenging. I found it easiest to start by first sewing along the long edge of the back piece, and then sewing one edge at a time the rest of the way around. Don't forget to snip the zippered tube piece where it rounds the corners. And trim seams as much as possible - pinking shears are a nice touch since the seam is exposed.
When you have finished the first top/bottom piece, don't forget to UNZIP the bag so that you will be able to turn it right side out after you sew the second piece!
Then turn the whole thing right side out and you're done!
Because of all the bulk, it had some imperfections that bugged me, but I don't think she noticed!
If you're into sewing bags, check out these other posts:
 |
| Cosmetics bags |
 |
| Reusable drawstring bags |
 |
| Pencil Case |
 |
| Repurposed gym shorts |
 |
| Velcro baby food bag |


No comments:
Post a Comment
Comments are very much appreciated!