43 Project Ideas for Silhouette Cameo (Pin This!)


I debated calling this "43 reasons to get a Silhouette"...  If you're thinking about getting yourself a Silhouette (you should! and use my affiliate link please!) or you have one and you're not sure where to begin (it can be overwhelming), here are a variety of super creative ideas to get started.  Most have links to tutorials, but some are just eye candy.  I spent WEEKS putting this together so, for heaven's sake, the least you could do is pin it for later ;)  


Installing Snaps The Ol' Fashioned Way, With A Hammer


I'm not sure if "installing" is the right word, but here goes.  Different snaps may require different tools (for example, I haven't figured out how to put in a pearl snap without cracking it), and you can even buy snap tape... but I put in snaps the ol' fashioned way.  I have tried that plier/hole punch looking tool but I couldn't get the snap to align properly. I bought the package of snaps at Wal Mart that comes with the tool, and now I buy snaps in bulk but I still use the same tool.  I put snaps in my Irish flat caps, so that is what you will see in the examples.

How I Finally "Got" Compound Paths: Fleur de Lis Oval Frame with (you guessed it) Silhouette Cameo


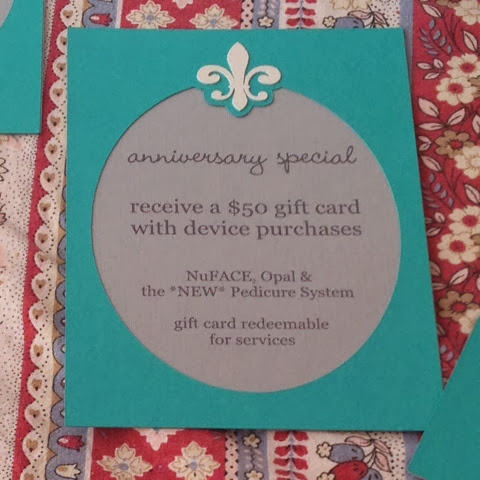
I made these fleur-de-lis signs for my mom's skincare business' 9th anniversary party, to match the invitations we made. I won't get too picture crazy but I want to give you the lowdown on how it went together.  I had a little breakthrough and came one step closer to understanding compound paths, which sure makes designing easier, so I hope this helps you "get it" too.

Ham and Gruyère Waffles


I had the rare opportunity to sleepover at my moms this weekend, and relished our morning coffee time in PJs. When I realized she had both ham and gruyère on hand, I knew we must make these waffles.  I don't make waffles often because, unlike pancakes which require only a bowl and a whisk, I have to go to the trouble of getting out the hand mixer to beat the egg whites which just seems like too much effort for a weekend morning.  These waffles, however, are worth the effort.  They are perfect with mimosas for brunch, and as soon as I perfect a complementary herbed butter I'll be a millionaire. Cheddar or Swiss would be just as good, but the gruyère adds a little je ne sais quoi.  (See there how I used a French expression and made it sound fancy without really describing anything?  That's what makes these waffles so good.)

Basic (But Not Too Basic) Design Functions With Silhouette Studio


If you're ready to move beyond downloading a shape, resizing it and cutting then you will appreciate this post.  I just took some screen shots showing some of the things you can do with the Silhouette Design Studio - Group, Ungroup, Weld, Subtract, Offset, Knife/Slice, Compound Paths, Align and Curved Text.  Just basic stuff, but some neat tricks that might take a while to figure out on your own (I learned a lot of this by pouring through countless tutorials online, hopefully this saves you the trouble).

Quick Nachos (With Real Cheese)


I was doing my usual Costco run the other day and they were sampling these Veggie chips that look like Tostito Scoops. "What makes them veggie?" I asked. I hadn't even planned on sampling them until she said "kale and broccoli" and I perked right up. Hmmm what's that now, kale you say?  Now, I realize these are essentially just corn tortilla chips with like a tenth of a gram of any remotely healthy vegetable... but that's a tenth of a gram that I won't have to fight about with my kids. Plus they were on sale for $3.69 a bag, a huge Costco sized bag, so that pretty much made up my mind. I used them to whip up these quick (super tasty) nachos.  I didn't revolutionize nachos or anything, mostly I needed to break up all the Silhouette Cameo posts I'm working on!

Yes, You CAN Use Cricut Mats With Silhouette Cameo!


One of the challenges with the Cameo is that not all craft stores sell Silhouette products, and sometimes you need a blade or mat or whatever NOW.  Not in however many business days plus shipping and handling... RIGHT NOW!  This is where I found myself while making 200+ invitations and needing a new mat.  I do believe my local Michaels sells Silhouette products, but I was at Hobby Lobby getting cardstock (I had already bought up everything in the color I needed at JoAnn and Michaels!) and Hobby Lobby only had Cricut supplies, so you see my dilemma.  I bought a 2-pack of 12x12 Cricut mats on sale for $9.99.  They also had one light grip or one super grip for $10-14, so the 2-pack was the obvious choice for me.

When I got home, I lined up the Cricut mat with my Silhouette mat to see the difference.

Fleur-de-Lis Print-and-Cut Invitations with Silhouette Cameo


This post contains affiliate links :)

I got real close with my Cameo this week. We're best buds now. We've had a love/hate relationship thus far, and you know what took us to the next level?  Patience. Patience and a new mat. I made hundreds (literally) of these fleur de lis invitations and learned so much about the Silhouette in the process. The majority of my issues were resolved when I got a new mat. I spent the better part of 2 days working on this project with my original cutting mat which had lost most of its stickiness. I was cutting through the mat, the paper was moving around and tearing, it was a nightmare. Finally I realized that I needed a new mat so I got a 2-pack of Cricut mats (yes, that's right) and suddenly the clouds lifted and there were blue skies and angels singing. For realsies.  Also at some point I realized that I hadn't been locking the blade in correctly - how is this possible?!  I have always thought the blade locking wasn't designed well.  So here is the lowdown...

Finally! Paper Cutting Success With Silhouette Cameo & How To Use Weld And Offset


Cutting paper has been one of the most frustrating tasks with my Silhouette Cameo!  (affiliate link) I suppose that's because there are so many kinds of paper so you have to keep tweaking the settings.  Today my patience was rewarded with my first major success.  I had to write it up quick before I forgot everything and I figured I would turn it into a little demo using some of the basic tools in the Silhouette Design Studio while I was at it.

Printable Heat Transfer With The Silhouette Cameo Using Registration Marks

This post contains affiliate links :)

Did you ever get a care package in college?  I remember the time my mom sent me the best. cookies. ever.  I'm putting together a care package for my cousin who is a freshman at UNLV. She's still living at home, and I thought she especially needs a care package so she doesn't feel like she's missing out on the dorm experience. She's very health conscious so I packed her favorite dried mango and toasted seaweed from Trader Joes, some makeup, and I made her this shirt.  Not the most academic of care packages.  The design is inspired by the tattoo she wants, an American Traditional heart and banner that reads "Rudig girl" - Rudig being our mothers' maiden name, and the Rudig sisters (our aunts) being three strong, capable chicks.

If you don't know much about heat transfers, you can do it a couple different ways.  You can buy heat transfer vinyl in different colors, and even layer them if you want... or you can use printable heat transfer paper that allows you to print the design with an ordinary inkjet printer.  The printable option is nice for designs with more than one color if you don't want to deal with separating your design by color and cutting/applying multiple layers.  Printable heat transfer is also a good option for designs with shading, like the heart and bird in my design.