You need two pieces of fabric that are twice the length/width of the finished bow tie. I like mine to be about 2x3" for babies and toddlers or 2.5x3.5" for little kids. Which means your fabric should be cut to either 4x6" or 5x7".
In the next photo, notice the piece of lightweight fusible interfacing - I would only use that with very light fabrics, like silk or lawn, that need body. It should be cut to the size of the finished bow tie, and ironed in the center of the fabric.
Fold and press the top, bottom and sides to the center, in that order, so that the ends are going up/down (see above photo, on the right). Do this with both pieces and stack them with the raw edges (flappy sides) facing each other, as pictured below.
Now for the other pieces. The width of the neck strap will depend on your hardware. Mine is 3/4" plus a 3/8" seam allowance, times two since it's going to be folded... 16x2.25". Press in half lengthwise.
The tie that goes around the center of the bow should be 1/2" for babies and 3/4" for kids, so with seam allowance and doubling for the folding, that's 1.75x4"or 2.25x4".
For the center tie (the smaller piece) sew the long edges closed with 3/8" seam allowance.
It's easier to turn the tube if one of the short ends is closed.
Trim the seam. Then turn the tube using a tool like this, or using a couple pencils like this.
Snip the closed end off.
And iron with the seam in the middle (this will be the back side). This is why we didn't fold/press this piece in half.
With the longer neck strap, sew one of the short ends and the long edges with a 3/8" seam allowance.
Trim seam. Turn the tube using the links from the last step.
And press with the seam to the side.
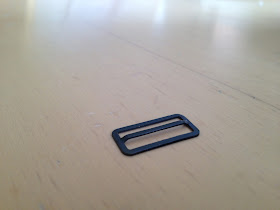
Get out your hardware! Basically you are going to anchor one end to the adjustor piece, thread the other end through one hook piece, then back through the adjustor piece and secure the hook to the other end. Too much information? Here's the step-by-step description:
See how the middle bar of the adjuster part sticks out on one side?
Thread one of the ends of the neck strap under the bar.
And fold the raw end over and stitch to secure. I like to zigzag back and forth a few times.
Thread the other end through the eye part (I'm not sure what it's called, the piece that the hook hooks to??)
Here you can see the whole picture so far.
Now thread up and back down through the adjuster piece...you might have to flip the adjuster around if it's facing the wrong way, you should be able to see both of the bars.
And you're ready to a attach the hook piece.
Just put it through, fold it over and stitch like before.
Here's what you have so far. Get your needle and thread ready.
Although it's an adjustable strap, I like to make it the appropriate length and then position the bow tie so that the hardware is at the back of the neck. The pin marks where I will attach the bow tie.
Take your little bundle from earlier...
And fold it into a bow tie sandwich. Fold the whole thing lengthwise, then fold each edge back the other way. I think if you study the next few pictures you'll get it.
Run your threaded needle through the center.
And keep going back and forth and wrap it around a few times to hold your nice folding in place.
Now to keep those loose corners that stick out from inbetween the layers from coming undone, run your needle and thread inward, catching the ragged edges. Do this on all four corners.
Then place your strap face down on the bow and bring the needle through.
Get your center tie piece and begin to wrap it around, make sure the right side faces out (so the center seam doesn't show).
Pull the needle through one of the ends of the tie.
Check that placement is centered nicely.
Wrap the other end around fairly tight and bring the needle through to hold in place.
Snip the excess tie approximately 1/4-3/8" from the thread.
Begin stitching the end of the tie down with several stitches all along the raw edge. I usually make two passes. Tie off and bury the tail somewhere deep in the knot of the bow tie.
You can still adjust the bow and the center tie as needed. I used to think hand stitching was kind of a pain but I enjoy it now.
A sweet lil mans' bow tie!


How do you determine the length of the strap?
ReplyDeleteI'm sorry I missed this comment and didn't reply right away! Hopefully it's not too late... I usually make the strap 16" and adjust it down to 10-12" for little kids. You can start out as long as you want and then play with the adjustor piece and see how long you want it before you stitch the last hook piece into place.
DeleteWhere did you get your hardware?
ReplyDeleteI buy most of my supplies on Etsy! Much cheaper than craft stores.
DeleteI read somewhere that when you're making a bow tie it's always best to cut the fabric on the bias rather than the grain. But does that only apply to the self-tie ones?
ReplyDeleteI want to make a really nice bow tie for my friend as a gift and I'm still stuck on this lil issue on cutting on the bias or grain when it comes to making an adjustable bow tie :(
I do believe cutting on the bias is the proper way :)
Delete